





MacBook Air 13" A1466 Screen Replacement Complete LCD Display Assembly (Mid 2012)
MacBook Air 13" A1466 Screen Replacement Complete LCD Display Assembly (Mid 2012)
 In Stock
Regular price
NZ$289.99
Regular price
Sale price
NZ$289.99
Unit price
per
inc GST
 Ships today
MacBook Air 13" A1466 Screen Replacement Complete LCD Display Assembly (Mid 2012)
MacBook Air 13" A1466 Screen Replacement Complete LCD Display Assembly (Mid 2012)
In Stock
Regular price
NZ$289.99
Regular price
Sale price
NZ$289.99
Unit price
per
inc GST
DIY DIFFICULTY
ModerateAbout 45 minutes to 1 hour
The fan, I/O board, battery and logic board come out first. The display cables unplug before the T8 hinge screws.
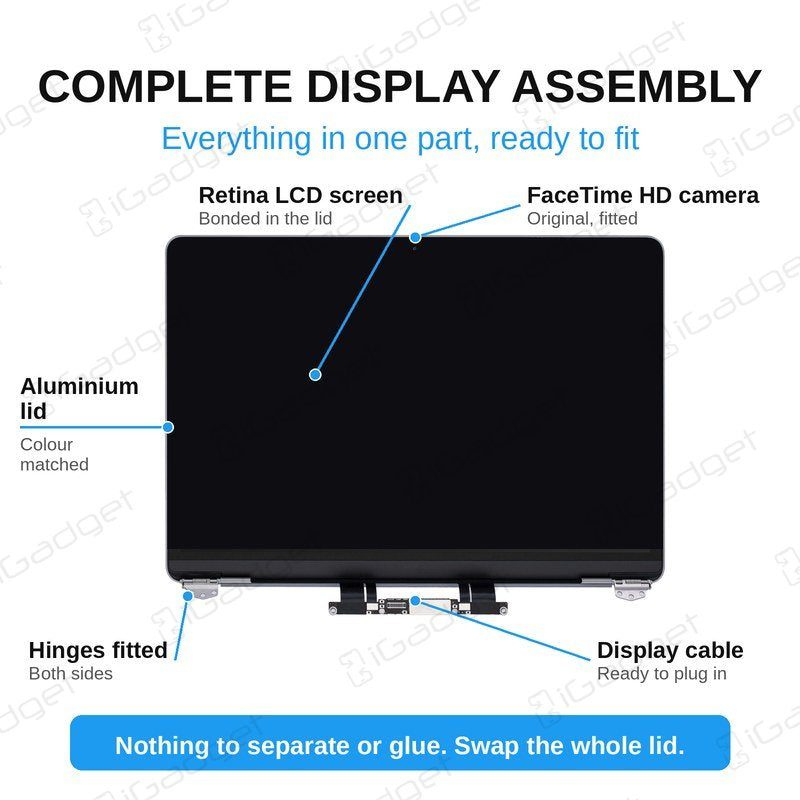
- Complete display assembly (whole lid) for the Mid 2012 MacBook Air 13" A1466, with the LCD screen, camera, hinges and display cables already fitted
- Fixes a cracked, black, flickering, lined or bleeding screen, a damaged display cable or a bent lid
- Compatible with MacBook Air 13" A1466 Mid 2012 (EMC 2559, MacBookAir5,2)
Frequently Bought Together


Frequently Bought Together
Product Details
Cracked screen, black display, lines or flickering on your Mid 2012 MacBook Air 13" A1466? Replace the damaged LCD with this complete display assembly.
It is a 13.3" 1440 x 900 LCD screen, supplied as a complete silver lid with the camera, hinges and display cables already fitted. The display is held in with screws at the hinges, so no heat or adhesive is needed and there is no glass or panel to separate.
Part Includes:
- 1440 x 900 13.3" LCD Screen
- Aluminium lid (back housing) and bezel
- Hinges
- Front Camera
- Camera connection cable
- LCD display cable
- 12 Month Warranty
Please Note
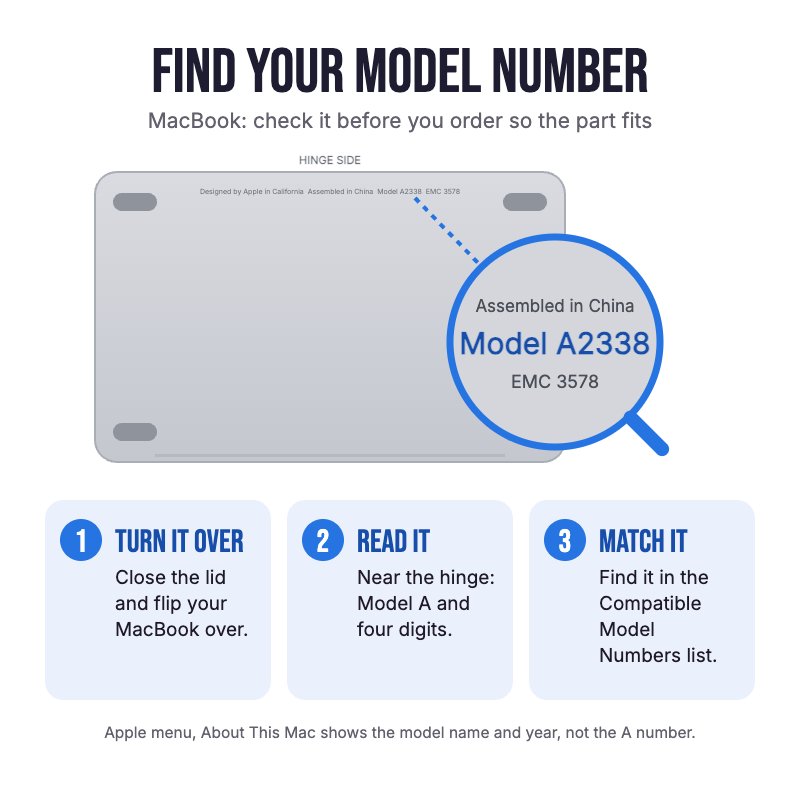
Does NOT fit the 2013-2017 A1466 or the 2010-2011 A1369. Check the A-number on the bottom case for your model.
Please Note
Built for the Mid 2012 A1466 (EMC 2559), whose display cables differ from the 2013-2017 models. It comes in silver.
Please Note
Not an official Apple part. Mounting screws are not included, so reuse your hinge screws.
Specifications
- Part Type: Complete Display Assembly (Lid)
- Colour: Silver
- Screen Size: 13.3"
- Screen Type: LCD
- Resolution: 1440 x 900
- LCD Panel: OEM LCD panel, assembled at the panel maker's factory
- Lid: OEM aluminium lid with original hinges
- Camera: Original FaceTime HD camera
- Backlight and reflective sheets: High-brightness compatible parts
- Springs, metal strip and rubber seal: Original
- Adhesive: Strong 3M compatible adhesive
- Connections: LCD and front camera
- Compatible Part Numbers: 661-6630
- Mounting Screws: Not included
- Warranty: 12 Months
How do I find my Model number?
 MacBook Air 13" Mid 2012
Compatible Model Numbers
MacBook Air 13" Mid 2012Model Number (A Number)
- A1466
EMC Number
- EMC 2559
 MacBook Air 13" Mid 2012 How do I find my Model number?
Model Identifier
- MacBookAir5,2
Device Number (M Number)
- MD231
- MD232
- MD628
- MD846
More info Less info
Installation Help

Check out the video above or the step by step guide below for assistance with this repair
iFixit MacBook Air 13" Mid 2012 Display Assembly Replacement Guide

Here are some tools you may need to help you complete the repair.
- P5 Metal Pentalobe 1.2mm Screwdriver Tool
- T5 Metal Torx Screwdriver Tool
- T8 Torx Security Screwdriver Tool
- Or get the P5, T5 and T8 together in our 10 Piece MacBook Repair Toolkit
- Nylon Antistatic Spudger Pry Tool
- iGadget Universal Magnetic Work Project Mat with Marker (30cm x 25cm)

Here are some helpful tips to assist you in completing a safe repair on your device. If you are unsure of something or have any questions, please feel free to contact us either by phone (0508 IGADGET) or by email
- Drain the battery below 25% before you start on this repair
- Always power down your MacBook before you start
- Always track your screws (the P5 bottom case screws are different lengths) to avoid putting them back in the wrong place and damaging your device. Draw a picture of your laptop and tape the screws to the right places, or use a magnetic work mat
- Pull the bottom case up off the clips with your fingers once the screws are out
- Disconnect the battery by pulling the clear tab on its connector parallel to the board, towards the front edge, not upwards, or you can damage the socket. Always unplug the battery before you remove any other parts. Keep metal tools away from the battery, and never bend, crush or puncture it.
- In the iFixit guide the fan, I/O board, battery and logic board come out (T5 screws) to reach the display cables. Lift the battery out without squeezing the four exposed cells, and flip up the ZIF cable flaps with the spudger before sliding any ribbon cable out
- Pry the antenna connectors up with the spudger, then pull the camera and display data cables out parallel to the board by their tabs, not upwards
- The display hinges are held by T8 screws. Open the display to 90 degrees and support it on the table before you remove the last screw on each side
- Route the LCD, camera and antenna cables so they don't get pinched by the hinge, and tuck the antenna cables back into their channel
- Test the screen, camera and Wi-Fi before you refit the bottom case, and leave the protective film and stickers on until the new screen is working properly.
What’s In The Box
- 1x A1466 MacBook Air 13" Complete Display Assembly Mid 2012
Related Products


