





iPhone 7 Battery Replacement | 1960mAh | Premium Zero-Cycle
iPhone 7 Battery Replacement | 1960mAh | Premium Zero-Cycle
27
IPH7-15
 In Stock
Regular price
NZ$16.99
Regular price
Sale price
NZ$16.99
Unit price
per
inc GST


iPhone 7 Battery Replacement | 1960mAh | Premium Zero-Cycle
iPhone 7 Battery Replacement | 1960mAh | Premium Zero-Cycle
27
IPH7-15
In Stock
Regular price
NZ$16.99
Regular price
Sale price
NZ$16.99
Unit price
per
inc GST
DIY DIFFICULTY
ModerateAbout 30 minutes to 2 hours
Held in by two stretch-release strips. The screen comes off first, opened with heat and picks.
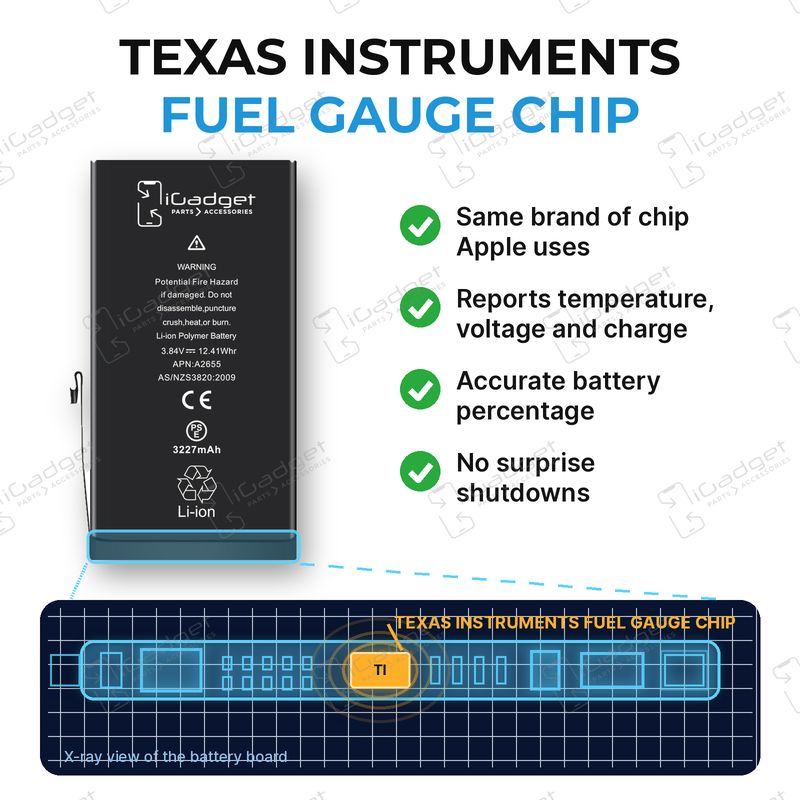
- Premium 1960mAh zero-cycle battery with a Texas Instruments fuel gauge chip, battery adhesive included
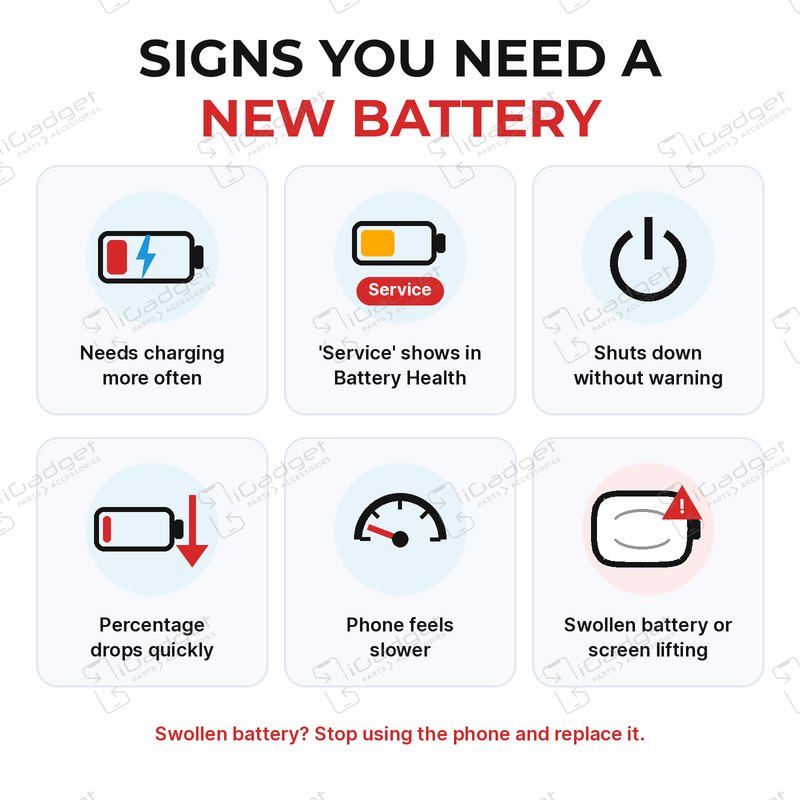
- Replaces a battery that drains fast, won't hold a charge, shuts down early or shows a Service message
- Compatible with iPhone 7 models: A1660, A1778, A1779 and A1780
Frequently Bought Together




Frequently Bought Together


Product Details

Is your iPhone 7 draining fast, shutting down early, not turning on or showing a Service message in Battery Health? A worn battery is usually the cause. This is a new 1960mAh replacement (Apple part 616-00255).
- TEXAS INSTRUMENTS FUEL GAUGE CHIP - The same brand of chip Apple uses, reporting temperature, voltage and charge to your iPhone.
- NO SURPRISE SHUTDOWNS - Accurate readings help your iPhone charge safely, stop at full and show a true percentage, so no sudden drops or early shutdowns like low-grade chips cause.
- ZERO CYCLE CELL - A brand new cell, never used in a phone, so you start with its full life.
- FULL 1960mAh CAPACITY - Rated at 1960mAh, the same as the battery Apple fitted to the iPhone 7.
- BATTERY HEALTH SHOWS - Settings shows the new battery's Battery Health and maximum capacity, so you can keep an eye on it.
- SENT FROM NZ STOCK - Shipped from our New Zealand stock, so there's no waiting weeks for a part to arrive from overseas.
Part Includes:
- iPhone 7 Replacement Battery
- Battery Adhesive Strips
- 12 Month Warranty
Please Note
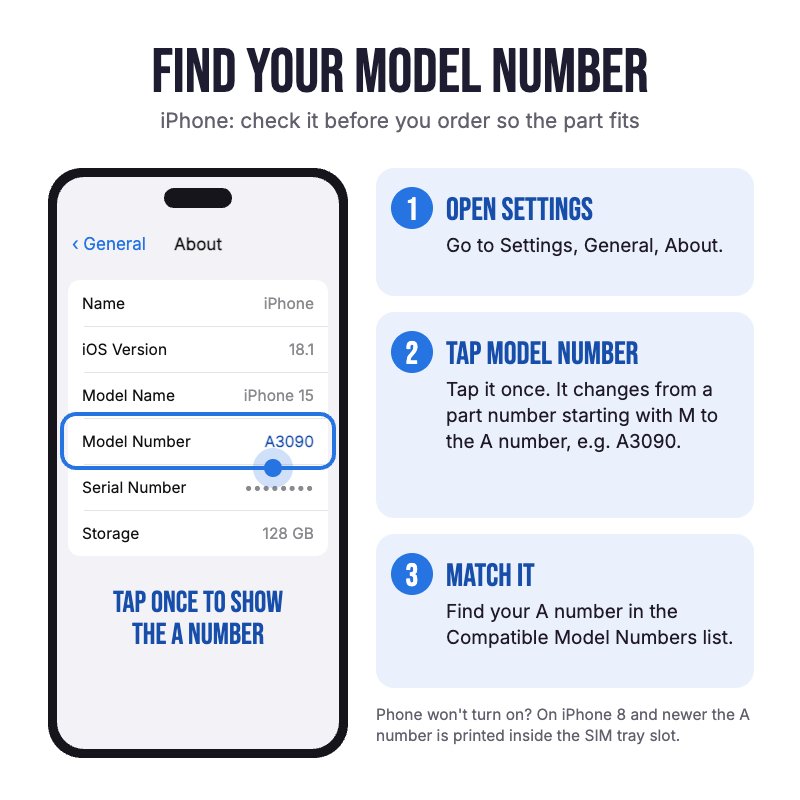
Does NOT fit the iPhone 8, 7 Plus or 6s. Check in Settings, General, About for your model.
Please Note
New stretch-release adhesive strips with pull tabs come in the box, so the battery sits secure and can come out cleanly next time.
Please Note
Aftermarket battery, not an official Apple part. It works just like the original.
Specifications
- Compatible Part Numbers: 616-00255, 616-00256, 616-00258
- Voltage: 3.8V
- Watt Hours: 7.45Whr
- Capacity: 1960mAh
- Chipset: Texas Instruments
- Battery Type: Lithium-ion polymer
- Condition: Brand new cell
- Pairing: Not needed. No battery pairing message on the iPhone 7.
- Warranty: 12 Months
How do I find my Model number?
 iPhone 7
Compatible Model Numbers
iPhone 7Model Number (A Number)
- A1660
- A1778
- A1779
- A1780
 iPhone 7 Model Numbers
Model Identifier
- iPhone9,1
- iPhone9,3
EMC Number
- EMC 3091
Device Number (M Number)
- MN8G2
- MN8H2
- MN8J2
- MN8K2
- MN8L2
- MN8M2
- MN8N2
- MN8P2
- MN8Q2
- MN8R2
- MN8T2
- MN8U2
- MN8V2
- MN8W2
- MN8X2
- MN902
- MN912
- MN922
- MN942
- MN952
- MN962
- MN972
- MN9C2
- MN9D2
- MN9E2
- MN9F2
- MN9G2
- MN9H2
- MN9J2
- MN9K2
- MN9L2
- MN9M2
- MN9N2
- MN9P2
- MN9Q2
- MN9R2
- MN9T2
- MN9U2
- MN9V2
- MN9W2
- MN9X2
- MN9Y2
- MNA02
- MNA32
- MNA42
- MNA52
- MNA62
- MNA72
- MNA82
- MNA92
- MNAA2
- MNAC2
- MNAD2
- MNAE2
- MNAF2
- MNAJ2
- MNAK2
- MNAL2
- MNAM2
- MNAP2
- MNAQ2
- MNAU2
- MNAV2
- MNAW2
- MNAX2
- MNAY2
- MNC02
- MNC12
- MNC22
- MNC32
- MNC42
- MNC52
- MNC62
- MNC72
- MNC82
- MNC92
- MNCA2
- MNCC2
- MNCD2
- MNCE2
- MNCF2
- MNCG2
- MNCJ2
- MNCK2
- MNCL2
- MNCM2
- MNCN2
- MNCP2
- MNCQ2
- MNCR2
- MNCT2
- MNCU2
- MNCV2
- MNGQ2
- MNGX2
- MNH02
- MNH12
- MPRH2
- MPRJ2
- MPRL2
- MPRM2
- MPRN2
- MPRP2
- MPRQ2
- MPRR2
- MPRT2
- MPRU2
- MPRV2
- MPRW2
- MQTT2
- MQTU2
- MQTV2
- MQTW2
- MQTY2
- MPRX2
- MPRY2
More info Less info
Installation Help

Check out the video above or the step by step guide below for assistance with this repair
iFixit iPhone 7 Battery Replacement Guide
Remember
After completing your repair, calibrate your newly installed battery by charging it to 100% and then charging for a further two hours. Use your iPhone until it shuts off due to low battery, and finally, charge it uninterrupted to 100% again

Here are some tools you may need to help you complete the repair.
Please note: A discounted simple toolset with the tools you need is available in a pop-up when you add this product to cart
- P2 Metal Pentalobe 0.8mm Screwdriver Tool
- Y000 Metal Triwing Tri-Point 0.6mm Screwdriver Tool
- #000 1.5mm Metal Phillips Screwdriver Tool (PH000)
- Large Blue Suction Cup Opening Tool
- Mechanic AK-15 King ESD Anti-Static Stainless Steel Red Curved Tweezers
- iGadget Plastic Triangle Opening Picks (set of 5)
- 5x iGadget Plastic Flexible Opening Cards
- Nylon Antistatic Spudger Pry Tool
- Or get the P2, Y000 and #000 screwdrivers, suction cup, tweezers, opening pick, opening card and spudger together in our 8 Piece iPhone Repair Toolkit
- iSclack Evo (Gen 3) Suction Cup Opening Tool for phones and tablets by Dottorpod
- uFix iOpener Microwaveable Heated Bag Opening Tool
- iHold Evo Screen Holding Opening Tool for iPads and iPhones with USB-C Adapter by Dottorpod
- iGadget Plastic Alcohol 200mL Bottle with Pump Top
- iPhone 7 LCD Water Resistant Screen Gasket Adhesive
- iGadget Universal Magnetic Work Project Mat with Marker (30cm x 25cm)

Here are some helpful tips to assist you in completing a safe repair on your device. If you are unsure of something or have any questions, please feel free to contact us either by phone (0508 IGADGET) or by email
- Drain the battery below 25% and power the phone off before you start. A charged lithium-ion battery can catch fire if it's punctured or damaged
- Remove the pentalobe screws by the Lightning port. Warm the bottom edge with the iOpener in short bursts to protect the battery. Lift the screen with a suction cup above the home button and work an opening pick around, no more than 3mm deep, clear of the display cables on the right edge
- Slide the screen slightly down, away from the top, to free the top clips, then open it from the left like a book. Lift it only a little until the cables are unplugged, and prop it up (an iHold Evo helps)
- Track your screws on a magnetic mat or tape them to a drawing of your phone. They're different lengths, and a long screw in a short hole can damage the logic board
- Always unplug the battery before you remove any other parts. Keep metal tools away from the battery, and never bend, crush or puncture it.
- Remove the lower connector bracket (Y000) and unplug the battery, then the two lower display cables. Remove the front sensor bracket (Phillips or Y000 depending on the phone), unplug the front sensor cable and lift the screen off. Remove the barometric vent and Taptic Engine (Phillips) to reach the battery
- Two stretch-release strips hold the battery, both on its lower edge. Peel the tabs back and pull each slowly towards the bottom of the phone, low and flat; winding it around your tweezers. Hold the battery as you pull. If a strip breaks, drip isopropyl alcohol under that edge, wait a minute, then lift the battery slowly with a plastic card. Never pry between the volume down button and battery
- Clean off any old adhesive and fit the new adhesive strips from the box. Press the battery connector down until it clicks, then check the phone powers on and charges before you seal it up
- Clean off the old screen adhesive with isopropyl alcohol and fit a new screen gasket adhesive before you close it up
- If the new battery drains fast or shuts off, reseat the battery connector, check it for foam or debris and make sure the flex isn't strained, then do a force restart
Caution
If the new battery or the battery in your device is swollen or damaged during repair, take the proper precautions
Note
You cannot dispose of old batteries in your general waste. Find recycling e-waste centres online or take to your local refuse station.
What's In The Box
- 1x iPhone 7 Replacement Battery
- 1x Replacement Battery Adhesive


